Set Up Email Notifications with Botpress and Zapier
Introduction
This article explains how to Set Up Email Notifications with Botpress and Zapier. In today’s fast-paced digital world, staying connected with your customers is more important than ever. One way to ensure you never miss a beat is by setting up automated email notifications for every customer interaction with your chatbot. Welcome to this comprehensive guide on automating customer engagement through Botpress and Zapier.We will walk you through the process step-by-step.
Before diving into the tutorial, it’s essential to understand what you’ll be achieving by the end of it. You’ll have a Botpress chatbot that interacts with users and collects their information. This information will then be sent to a designated email account via Zapier, ensuring that you can promptly follow up on potential leads or customer queries.
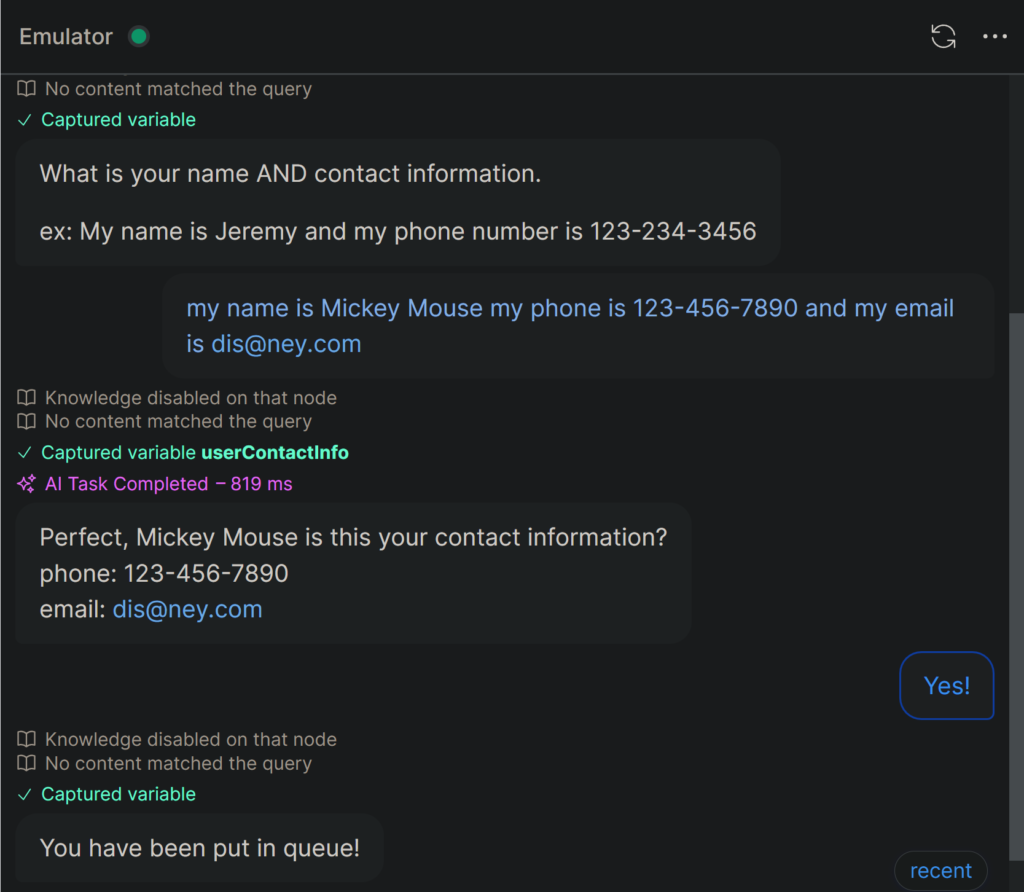
Conversation with Bot
Company Email Inbox
Prerequisites
To follow along with this tutorial, you’ll need:
A Botpress account
A Zapier account
Basic understanding of chatbot workflows and email automation
Setting Up Your Botpress Chatbot - Email Notifications
Step 1: Create a New Standard Node
Start by logging into your Botpress account and navigating to the chatbot you wish to work on. Create a new standard node and name it “Capture.”
Step 2: Add a Raw Input Card
In this node, add a “Raw Input Card” to prompt the user for their name and contact information (either phone or email). Store this information in a new variable, which we’ll call bot_user_response.
Step 3: Add an AI Task
Next, add an AI task to this node. The task will extract the user’s name and contact information from the input and store it in respective variables. For example, if the user input is “My name is John Doe, and my email is john@example.com,” the API task will store “John Doe” in a name variable and “john@example.com” in an email variable.
Step 4: User Confirmation
After capturing the information, add a text card that reads back the captured information to the user for confirmation. For instance, “Perfect, [User’s Name]. Is this your correct contact information?”
Integrating with Zapier
Step 1: Create a New Zap
Next, Log into your Zapier account and create a new Zap. For the trigger, search for “Webhooks by Zapier” and select “Catch Hook.”
Step 2: Get Webhook URL
After setting up the trigger, Zapier will provide you with a webhook URL. Copy this URL as you’ll need it for the next step.
Step 3: Execute Code in Botpress
Now, we will return to Botpress and add an “Execute Code” card to your “Capture” node. Paste the webhook URL from Zapier here. This card will send the captured name, email, and phone number to Zapier.
Finally, add an action to your Zap in Zapier. Choose Gmail and select “Send an Email.” Fill out the necessary fields, such as the recipient email, subject, and body. Make sure to insert the variables captured by the bot.
Testing and Deployment
After setting up both Botpress and Zapier, it’s time to test the workflow. Interact with your Botpress chatbot, follow the prompts, and check if an email notification is sent to the designated email account. Once confirmed, you’re ready to publish your chatbot and start automating your customer engagement.
Conclusion
Automating customer engagement doesn’t have to be complicated. With Botpress and Zapier, you can easily set up a system that keeps you informed and responsive to your customer’s needs. So go ahead, give it a try, and take your customer service to the next level.